
打包 Vue3 Component Package (ts)
tags: Vue Vite TypeScript
category: Front-End
description: 打包 Vue3 Component Package (typescript)
created_at: 2023/02/09 12:00:00

前言
還沒看過上一篇的可能會需要先看,打包的基礎(JavaScript版)
這一篇會加上 TypeScript 與 TailwindCSS,然後目標是完成一個拖放檔案上傳的功能。
簡易需求
- 一個拖放的眶
- 可以使用點擊的方式選擇檔案
- 可以使用拖檔案進來的方式上傳
- 不管使用什麼方式,只要上傳就拋出(
emit)事件
老樣子建立 Vue3 專案
$ npm init vue@latest這邊記得要勾選 TypeScript。不然就跟上一篇幾乎一樣了
建立好專案之後一樣先切進去安裝好相依套件。
安裝 TailwindCSS
可以從官方自己安裝,或是使用我之前寫的指令幫你裝好設定好
$ npx lai-cmd init vue-tailwindcss目前只能用 npm 幫你裝,希望未來有空改版讓他支援其他套件管理器..
整理專案目錄
老樣子先留下 App.vue 然後把內容換成
<script setup lang="ts"></script>

<template>Hello World</template>
然後 assets 當中的 CSS 留下 main.css,且只留下三行
@tailwind base;
@tailwind components;
@tailwind utilities;
然後在 App.vue 加上 class 測試樣式正不正常
<template>
  <div class="bg-blue-500">Hello World</div>
</template>
這時如果有看到藍色背景的話就是成功了。
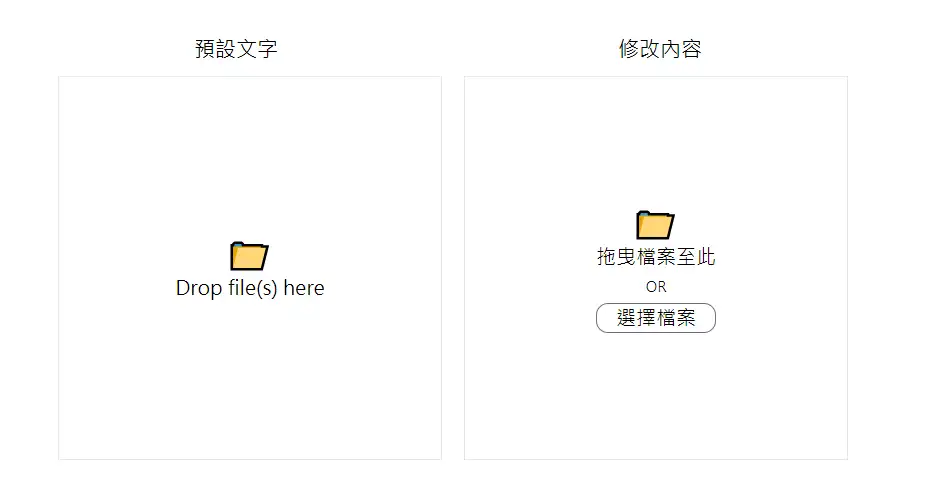
先看成品
打算做成這樣
建立檔案: ./src/components/TheDropFileUpload.vue
節省篇幅我就全貼了(因為重點也不是這個)
<script setup lang="ts">
import { ref } from "vue";

interface Props {
  class?: string;
  enterClass?: string;
}

interface Emits {
  (e: "upload", files: FileList): void;
}

const isDragEnter = ref(false);
const fileInput = ref<HTMLInputElement | null>(null);
const props = withDefaults(defineProps<Props>(), {
  class: "",
  enterClass: "bg-blue-200",
});

const $emit = defineEmits<Emits>();

const onDragEnter = () => {
  isDragEnter.value = true;
};

const onDragLeave = () => {
  isDragEnter.value = false;
};

const onDrop = (e: DragEvent) => {
  onDragLeave();
  const files = e.dataTransfer?.files;
  if (files) {
    upload(files);
  }
};

const onChange = (e: Event) => {
  const files = (e.target as HTMLInputElement).files;
  if (files) {
    upload(files);
  }
};

const upload = (files: FileList) => {
  $emit("upload", files);
};
</script>

<template>
  <input type="file" ref="fileInput" class="hidden" @change="onChange" />

  <div :class="['relative', props.class, { [props.enterClass]: isDragEnter }]">
    <div
      class="absolute top-0 left-0 w-full h-full z-50"
      @dragenter.prevent="onDragEnter"
      @dragover.prevent=""
      @dragleave.prevent="onDragLeave"
      @drop.prevent="onDrop"
      @click="fileInput?.click()"
    ></div>
    <div>
      <slot>
        <div class="text-center">
          <slot name="icon"><div class="text-4xl">📁</div></slot>
          <div class="text-xl">
            <slot name="text">Drop file(s) here</slot>
          </div>
        </div>
      </slot>
    </div>
  </div>
</template>
如果碰到 Default export of the module has or is using private name 'Props'.ts(4082) 這個問題,這裡提供兩種解法(雖然他不影響執行,但看了不開心)
- 把
interface Props加上export - 把
interface Props改成type Props =
在 App.vue 測試
<script setup lang="ts">
import TheDropFileUpload from "./components/TheDropFileUpload.vue";

const onUpload = (files: FileList) => {
  console.log(files);
};
</script>

<template>
  <TheDropFileUpload
    @upload="onUpload"
    class="w-96 h-96 border mx-auto mt-4 flex items-center justify-center"
  >
    <template #text>
      <div>拖曳檔案至此</div>
      <small class="text-sm">OR</small>
      <div class="mt-1 border border-gray-500 rounded-xl">選擇檔案</div>
    </template>
  </TheDropFileUpload>
</template>
這時不管你是用選擇檔案或是拖放檔案的方式,應該都會看到 console.log 的訊息。
調整 TailwindCSS
因為我們用到了 TailwindCSS 的樣式,而未來使用這個套件的人可能也有安裝 TailwindCSS,可能會導致類別重複,所以要幫我們的類別加上前綴(prefix)去避免這個問題。
修改檔案: tailwind.config.js
module.exports = {
  content: ["./index.html", "./src/**/*.{vue,js,ts,jsx,tsx}"],
  theme: {
    extend: {},
  },
  plugins: [],
  prefix: "dfu-",  // <-- 加入這行
};
※提示: 這邊如果出現 'module' is not defined.,可以調整 ESLint 的設定,加上下面:
{
  // ...
  env: {
    node: true,
  },
  // ...
}
調整好之後會發現畫面的樣式都跑掉了,因為剛剛寫的 class 都缺少了 prefix (所以這一步未來要先做,不然最後一次改很容易出意外,只是透過這樣加深印象(?))
調整好的 TheDropFileUpload.vue 會長得這樣
<script setup lang="ts">
// ...
const props = withDefaults(defineProps<Props>(), {
  class: "",
  enterClass: "dfu-bg-blue-200",
});
// ...

</script>

<template>
  <input type="file" ref="fileInput" class="dfu-hidden" @change="onChange" />

  <div
    :class="['dfu-relative', props.class, { [props.enterClass]: isDragEnter }]"
  >
    <div
      class="dfu-absolute dfu-top-0 dfu-left-0 dfu-w-full dfu-h-full dfu-z-50"
      @dragenter.prevent="onDragEnter"
      @dragover.prevent=""
      @dragleave.prevent="onDragLeave"
      @drop.prevent="onDrop"
      @click="fileInput?.click()"
    ></div>
    <div>
      <slot>
        <div class="dfu-text-center">
          <slot name="icon"><div class="dfu-text-4xl">📁</div></slot>
          <div class="dfu-text-xl">
            <slot name="text">Drop file(s) here</slot>
          </div>
        </div>
      </slot>
    </div>
  </div>
</template>
而 App.vue 使用上也要小修
<template>
  <TheDropFileUpload
    @upload="onUpload"
    class="dfu-w-96 dfu-h-96 dfu-border dfu-mx-auto dfu-mt-4 dfu-flex dfu-items-center dfu-justify-center"
  >
    <template #text>
      <div>拖曳檔案至此</div>
      <small class="dfu-text-sm">OR</small>
      <div class="dfu-mt-1 dfu-border dfu-border-gray-500 dfu-rounded-xl">
        選擇檔案
      </div>
    </template>
  </TheDropFileUpload>
</template>
打包之前
先建立一個檔案當作套件的進入點,假設這邊是: /src/index.ts
import TheDropFileUpload from "./components/TheDropFileUpload.vue";

export default TheDropFileUpload;
如果是上一篇可能只會簡單寫這樣,但是這時我們用到了 TailwindCSS 所以要記得 import
import "tailwindcss/tailwind.css";打包
再來又進入了打包的環節,一樣可以參考 Vite 的官方文件
修改 vite.config.js
import { fileURLToPath, URL } from "node:url";

import { defineConfig } from "vite";
import vue from "@vitejs/plugin-vue";

import { resolve } from "path";

// https://vitejs.dev/config/
export default defineConfig({
  plugins: [vue()],
  resolve: {
    alias: {
      "@": fileURLToPath(new URL("./src", import.meta.url)),
    },
  },
  build: {
    lib: {
      entry: resolve(__dirname, "src/index.ts"),
      name: "DropFileUpload",
      fileName: "drop-file-upload",
    },
    rollupOptions: {
      external: ["vue"],
      output: {
        globals: {
          vue: "Vue",
        },
      },
    },
  },
});
再來就可以跑 Build 的指令了
$ npm run build這時會看到多了一個 dist 的資料夾,裡面也包含了剛剛上面 import 的樣式,但點進去會發現有很多 reset 用的樣式,既然是套件則不應該去影響這些 global 的東西,所以還要再幫 TailwindCSS 的設定檔加入一個設定。
{
  // ...
  corePlugins: {
    preflight: false,
  },
  // ...
}
這時再重新跑一次 build,就會發現那些 reset 的樣式不見了。
生成 .d.ts
對我來說用 TypeScript 有一個很大的誘因就是型別提示,或是說語法提示,可以在 build 的時候使用一個 plugin 讓他幫我們自動生成。
套件: vite-plugin-dts
安裝(假設使用 npm)
$ npm i vite-plugin-dts -D安裝好之後去改 vite.config.ts
import dts from 'vite-plugin-dts'

export default defineConfig({
  plugins: [vue(), dts()],  // <-- 加入 dts()
  // ...
});
這時再去 build 會發現他幫你生成了相關的 .d.ts 的檔案。
如果出現 Cannot find module '@babel/types' or its corresponding type declarations. 錯誤,可以安裝 @babel/types
$ npm i @babel/types -D可以再加入一個設定,讓他幫你生成的時候多一個進入點在根目錄,會更方便使用一些。
export default defineConfig({
  plugins: [
    vue(),
    dts({
      insertTypesEntry: true,  // <-- 加入這個
    }),
  ],
});
設定 Package.json
{
  "name": "vue3-drop-file-upload",
  "files": [
    "dist"
  ],
  "main": "./dist/drop-file-upload.umd.js",
  "module": "./dist/drop-file-upload.mjs",
  "types": "./dist/index.d.ts",  // <-- 還多了這個
  "exports": {
    ".": {
      "import": "./dist/drop-file-upload.mjs",
      "require": "./dist/drop-file-upload.umd.js"
    }
  },
  "version": "0.0.0",
  // ...
}
設定過後重新 build,dts 會幫你生成的進入點會變成 package.json 當中設定的 types 的路徑。
總結
接下來一樣可以在 Local 測試與發佈,篇幅的關係可以參考上一篇
這時就可以快樂的使用自己做的套件(?),又有型別提示,寫起來快樂很多。
發布後的結果可參考這裡