
Vue3 - 老樣子做個 TodoList - 代辦事項功能
tags: Vue
category: Front-End
description: Vue3 - 老樣子做個 TodoList - 代辦事項功能
created_at: 2022/07/27 22:00:00

回到 手把手開始寫 Vue3
前言
上一篇講完了關於使用者的部分,這一篇把剩餘的功能補齊。
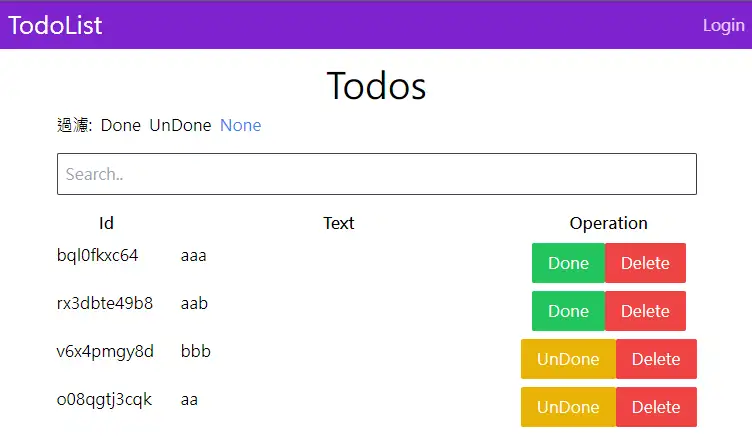
還是放一下成品的長相,還是很陽春。 DEMO
剩餘的功能
- 共通:
- 查看代辦事項清單
- 搜尋
- 從狀態過濾
- 切換狀態
- 刪除代辦事項
- 查看代辦事項清單
- 需登入:
- 新增代辦事項
雖然看起來上一篇消化了很少,但實際上是做得有點細緻(其他沒列出來XD),所以剩下這些應該反而比上一篇快(?)
老樣子 開始
現在先來建一個 store 來放 todos 相關的資料:(順便寫好新增的 action)
import { defineStore } from "pinia";
import { useUserStore } from "./user";

export const useTodoStore = defineStore({
  id: "todo",
  state: () => ({
    todos: [],
  }),
  getters: {},
  actions: {
    initTodos() {
      localStorage.todos = localStorage.todos || "[]";
      this.todos = JSON.parse(localStorage.todos);
    },

    addTodo(text) {
      // 假設你想要存這個 todo 是誰建的可以拿
      // 我這邊雖然拿了但我其實後續沒有任何處理XD
      const userStore = useUserStore();

      const todo = {
        id: Math.random().toString(36).substr(2),
        username: userStore.username,
        text,
        done: false,
      };

      this.todos.push(todo);
      localStorage.todos = JSON.stringify(this.todos);
    },
  },
});
比較特別的地方只有希望重新整理之後資料還在,所以一樣把代辦事項存在 localStorage。
再來要修改 Home 的頁面了
<script setup>
import { useUserStore } from "../stores/user";
import TheButton from "../components/TheButton.vue";

const userStore = useUserStore();
</script>

<template>
  <main>
    <h1 class="text-4xl text-center">
      Todos
      <TheButton
        class="bg-amber-300"
        @click="$router.push({ name: 'create-todo' })"
        v-if="userStore.isLogin"
        >Add</TheButton
      >
    </h1>
  </main>
</template>
這邊先做一個按鈕給他,可以連結到新增代辦事項的頁面,然後老樣子他會爆炸,因為根本還沒有那個路由,所以要去加路由跟頁面:
頁面的部分: AddTodoView.vue
<script setup>
import { ref } from "vue";
import { useRouter } from "vue-router";
import { useTodoStore } from "../stores/todo";
import TheInput from "../components/TheInput.vue";
import TheButton from "../components/TheButton.vue";

const todo = ref("");
const todoStore = useTodoStore();
const router = useRouter();

const addTodo = () => {
  todoStore.addTodo(todo);
  router.push({ name: "home" });
};
</script>

<template>
  <div>
    <h1 class="text-3xl ml-2">Add Todo</h1>

    <form @submit.prevent="addTodo">
      <div class="grid grid-cols-[100px_1fr] gap-2 items-center m-4">
        <TheInput label="todo-input" text="Todo: " v-model="todo" />
      </div>

      <div class="text-center mt-2 mx-4">
        <TheButton class="bg-green-500 text-white">Add</TheButton>
      </div>
    </form>
  </div>
</template>
路由的部分:
{
  path: "/create",
  name: "create-todo",
  component: () => import("../views/AddTodoView.vue"),
  meta: {
    requireAuth: true,
  },
},
都好之後基本上就可以正常新增 todo 了,但是目前畫面上還沒有把資料印出來。
所以再來就需要一個 TodoList 的組件。
<script setup>
import { useTodoStore } from "../stores/todo";
import TheTodo from "./TheTodo.vue";

const todoStore = useTodoStore();
todoStore.initTodos();
</script>

<template>
  <div class="max-w-[640px] mx-auto my-2">
    <div class="grid grid-cols-[100px_1fr_max-content] gap-2">
      <div class="text-center font-black">Id</div>
      <div class="text-center font-black">Text</div>
      <div class="text-center font-black">Operation</div>

      <TheTodo
        v-for="todo in todoStore.todos"
        :key="todo.id"
        :id="todo.id"
        :text="todo.text"
        :done="todo.done"
      />
    </div>
  </div>
</template>
然後每一個 todo 又是一個組件,這邊叫他 TheTodo.vue
<script setup>
import TheButton from "./TheButton.vue";

const props = defineProps({
  id: String,
  text: String,
  done: Boolean,
});
</script>

<template>
  <div>
    {{ props.id }}
  </div>

  <div class="flex-grow px-4">
    {{ props.text }}
  </div>

  <div class="text-center">
    <TheButton
      class="text-white"
      :class="{
        'bg-yellow-500': props.done,
        'bg-green-500': !props.done,
      }"
    >
      {{ props.done ? "UnDone" : "Done" }}
    </TheButton>
    <TheButton class="bg-red-500 text-white"> Delete </TheButton>
  </div>
</template>
畫面好了之後記得到 Home 要去使用他:
<script setup>
import TodoList from "../components/TodoList.vue";

</script>

<template>
  <main>
    <!-- ... -->
    <TodoList />
  </main>
</template>
到這邊回到首頁應該就會列出代辦事項清單了,但是按鈕都還沒有功能,所以要加兩個 action:
{
  // ...
  deleteTodo(id) {
    this.todos = this.todos.filter((todo) => todo.id !== id);
    localStorage.todos = JSON.stringify(this.todos);
  },

  switchStatus(id) {
    const todo = this.todos.find((todo) => todo.id === id);
    todo.done = !todo.done;
    localStorage.todos = JSON.stringify(this.todos);
  },
}
然後記得要在畫面上使用這兩個方法:
<TheButton
  class="text-white"
  :class="{
    'bg-yellow-500': props.done,
    'bg-green-500': !props.done,
  }"
  @click="todoStore.switchStatus(props.id)"
>
  {{ props.done ? "UnDone" : "Done" }}
</TheButton>
<TheButton
  class="bg-red-500 text-white"
  @click="todoStore.deleteTodo(props.id)"
>
  Delete
</TheButton>
上面記得也要 import 跟 use:
import { useTodoStore } from "../stores/todo";

const todoStore = useTodoStore();
這樣應該就可以切換狀態跟刪除了。
搜尋與過濾
這是剩下的兩個功能
要做這些功能,這邊的做法是也存一下搜尋的狀態,在透過 getters 回傳 todos,所以也改一下 store,另外因為中間步驟有點繁雜,所以直接貼最終的 code
import { defineStore } from "pinia";
import { useUserStore } from "./user";

export const useTodoStore = defineStore({
  id: "todo",
  state: () => ({
    search: {
      text: "",
      done: undefined,
    },
    rawTodos: [],
  }),
  getters: {
    todos: (state) =>
      state.rawTodos
        .filter(
          (todo) =>
            state.search.done === undefined ||
            todo.done.toString() === state.search.done
        )
        .filter((todo) => todo.text.includes(state.search.text)),
  },
  actions: {
    initTodos() {
      localStorage.todos = localStorage.todos || "[]";
      this.rawTodos = JSON.parse(localStorage.todos);
    },

    addTodo(text) {
      const userStore = useUserStore();

      const todo = {
        id: Math.random().toString(36).substr(2),
        username: userStore.username,
        text,
        done: false,
      };

      this.rawTodos.push(todo);
      localStorage.todos = JSON.stringify(this.rawTodos);
    },

    deleteTodo(id) {
      this.rawTodos = this.rawTodos.filter((todo) => todo.id !== id);
      localStorage.todos = JSON.stringify(this.rawTodos);
    },

    switchStatus(id) {
      const todo = this.rawTodos.find((todo) => todo.id === id);
      todo.done = !todo.done;
      localStorage.todos = JSON.stringify(this.rawTodos);
    },

    setSearch({ text, done }) {
      if (text !== undefined) {
        this.search.text = text;
      }

      this.search.done = done;
    },
  },
});
上面會發現原本宣告叫做 todos ,後來一時想不到其他名字就改成了 rawTodos(原始的 todos),而 todos 這個名稱移到了 getters ,他負責跟 search 相關的東西做一些運算產出結果,所以前面畫面上使用到的地方一個字都不用改。
然後 done 的部分也是用一個布林代表三種狀態,分別是
undefined= 沒設定過濾 = 全部顯示true= 只顯示完成的false= 只顯示還沒完成的
上面主要的重點大概是這樣 (偷懶)
再來 畫面的部分也要修改,首先先處理過濾好了:
這邊過濾特別練一下使用 GET 參數(也可以自己採用別的方式做),所以先在做一個組件出來,這邊叫他 TodoFilterLink.vue
<script setup>
import { RouterLink } from "vue-router";

const props = defineProps({
  done: String,
});
</script>

<template>
  <RouterLink
    class="hover:brightness-105 mx-1"
    :class="{ 'text-blue-500': $route.query.done === props.done }"
    :to="{
      name: 'home',
      query: { done: props.done ? props.done === 'true' : undefined },
    }"
  >
    <slot></slot>
  </RouterLink>
</template>
主要就是希望可以吃一個 done 的字串,然後幫我帶入 query 裡面跟一些樣式的修改。
而 TodoList.vue 畫面的部分要加上:
<div class="max-w-[640px] mx-auto my-2">
  <div>
    過濾:
    <TodoFilterLink done="true">Done</TodoFilterLink>
    <TodoFilterLink done="false">UnDone</TodoFilterLink>
    <TodoFilterLink>None</TodoFilterLink>
  </div>

  <!-- .... -->
</div>
而 javascript 的部分則要記得 import
import TodoFilterLink from "./TodoFilterLink.vue";到這邊至少可以點,有帶入網址了,但是他沒有起作用,所以要去監聽他改變就要設定進 search 的物件。
import { onMounted } from "vue";
import { onBeforeRouteUpdate, useRoute } from "vue-router";

// ...
const route = useRoute();
onBeforeRouteUpdate((to) => {
  const { done } = to.query;
  todoStore.setSearch({ done });
});

onMounted(() => {
  const { done } = route.query;
  todoStore.setSearch({ done });
});
這樣子過濾的功能就完成了,最後剩下搜尋。
都寫到這邊了,搜尋就變得相對簡單,只要下面這一段就完成了。
<div class="max-w-[640px] mx-auto my-2">
  <!-- ... -->

  <TheInput
    type="text"
    placeholder="Search.."
    class="w-full my-4"
    @input="
      todoStore.setSearch({
        ...todoStore.search,
        text: $event.target.value,
      })
    "
  />

  <!-- ... -->
</div>
最後想幫這個搜尋框加一個功能,就是當使用者輸入完一段時間沒更新才執行搜尋,這個功能在現在其實沒什麼必要(?),因為也沒去打 API,不會造成什麼負擔,只是為了做而做,當作一個 bonus。
這個功能叫做 debounce,這個語法印象中在 lodash 有提供,不過這邊自己做一個。
所以先建立一個 src/utils.js 專門放一些小功能。
export const useDebounce = (ms = 300) => {
  let timeout = null;
  return (fn) => {
    clearTimeout(timeout);
    timeout = setTimeout(() => fn(), ms);
  };
};
然後使用起來也很簡單,基本上就是建立一個 debounce 的函數,然後把要執行的函數包起來,像是下面這樣:
<script setup>
// ...
import { useDebounce } from "../utils";

// ...
const debounce = useDebounce(300);

// ...
</script>

<!-- ... -->
<TheInput
  type="text"
  placeholder="Search.."
  class="w-full my-4"
  @input="
    debounce(() =>
      todoStore.setSearch({
        ...todoStore.search,
        text: $event.target.value,
      })
    )
  "
/>
這時候你到前端去搜尋的時候,如果一直輸入就不會過濾,直到你停下 300ms 才會真的去搜尋。
這樣未來在打 API 搜尋才不會給伺服器造成太大負擔。
總結
到這邊終於大功告成了,雖然也沒有特別複雜的功能也不夠完整(?),而且還缺滿多可以做的,不過其他就當作自己的練習吧XD