
React Beautiful DnD 學習筆記
tags: Web React
category: Front-End
description: React Beautiful DnD 學習筆記
created_at: 2022/02/08 12:30:00
前言
在前幾個禮拜有想到想做的 Side Project , 就想說自己來做一個類似 Agile Board 的東西來記錄一下(說不定以後有什麼想法也都可以先往上黏 在慢慢消化),那絕對會用到的功能就是 Drag & Drop 了,而 React 做拖拉比較熱門的是下面兩套:
兩套我都有稍微去碰過,但最後選擇使用 react-beautiful-dnd 以得到更好的體驗,可能是我在起初學習的時候只有大概跑過官方的教學流程,所以不太清楚一般的 dnd 實作 transition 的複雜度,不像是 beautiful-dnd 已經都先處理好了。
題外話: dnd的範例是西洋棋的移動哦 有興趣可以去看
而 beautiful-dnd 的文件我自己是覺得看不太習慣(可能都在repo的關係),所以才打算整理成一篇,以後如果用到直接回來查這些常用的。
事前準備
- 裝好
Node.js
建立 React 專案
$ npx create-react-app dnd-app
or
$ yarn create react-app dnd-app
然後再一次 promote 一下自己的 cmd,可以下
$ npx lai-cmd init js去幫你設定好 eslint + prettier + jsconfig,這時只要你的 vscode,有安裝 EsLint 的擴充功能和相應的設定,應該就會運作正常。
如果你有使用 tailwindcss 也可以下指令幫你設定好哦!
$ npx lai-cmd init react-tailwindcss先安裝套件
# yarn
yarn add react-beautiful-dnd

# npm
npm install react-beautiful-dnd --save
先簡單裝飾一下 App.js
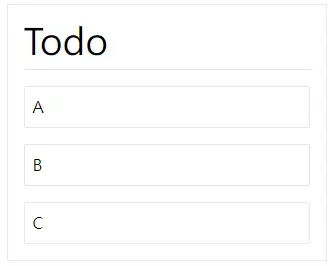
import React from 'react'

function App() {
  const items = ['A', 'B', 'C']
  return (
    <div className="border w-80 mx-auto mt-2 p-4">
      <h1 className="border-b mb-4 pb-2 text-4xl">Todo</h1>
      <main>
        {items.map((item, i) => (
          <div className="mt-4 p-2 border rounded-sm" key={i}>
            {item}
          </div>
        ))}
      </main>
    </div>
  )
}

export default App
再來加上 dnd 的功能
加上之前要先大概知道三個主要的元件與基本參數
- DragDropContext
- 可以綁定一些事件(關於生命週期)
- onBeforeCapture: 開始拖動之前,還可以對DOM做最後操作
- onBeforeDragStart: 開始拖動之前,這時已經蒐集完DOM的資訊
- onDragStart: 開始拖動
- onDragUpdate: 拖動中有變化,例如有換到順序
- onDragEnd (required): 拖動結束,這時應該要更新資料
- 可以綁定一些事件(關於生命週期)
- Droppable
- droppableId (required): 在同一個
Context中唯一的 ID - direction: 方向,預設為
vertical,也可以設定成horizontal
- droppableId (required): 在同一個
- Draggable
- draggableId (required): 在同一個
Context中唯一的 ID - index (required):跟順序相同的索引值
- draggableId (required): 在同一個
而 <Droppable> 與 <Draggable> 中的 children 都必須為一個函數。
稍微修改一下,就會得到以下的版本。
import React from 'react'
import { Draggable, DragDropContext, Droppable } from 'react-beautiful-dnd'

function App() {
  const items = ['A', 'B', 'C']
  return (
    <div className="border w-80 mx-auto mt-2 p-4">
      <DragDropContext
        onBeforeCapture={(e) => console.log('onBeforeCapture: ', e)}
        onBeforeDragStart={(e) => console.log('onBeforeDragStart: ', e)}
        onDragStart={(e) => console.log('onDragStart: ', e)}
        onDragUpdate={(e) => console.log('onDragUpdate: ', e)}
        onDragEnd={(e) => console.log('onDragEnd: ', e)}
      >
        <h1 className="border-b mb-4 pb-2 text-4xl">Todo</h1>
        <main>
          <Droppable droppableId="drop-id">
            {(provided) => (
              <div ref={provided.innerRef} {...provided.droppableProps}>
                {items.map((item, i) => (
                  <div key={item}>
                    <Draggable draggableId={item} index={i}>
                      {(provided) => (
                        <div
                          {...provided.draggableProps}
                          {...provided.dragHandleProps}
                          ref={provided.innerRef}
                          className="mt-4 p-2 border rounded-sm"
                        >
                          {item}
                        </div>
                      )}
                    </Draggable>
                  </div>
                ))}
                {provided.placeholder}
              </div>
            )}
          </Droppable>
        </main>
      </DragDropContext>
    </div>
  )
}

export default App
這時會發現可以拖拉了,但是並沒有真正的更換位置,那是因為資料並沒有被更新,所以要在拖拉結束之後更新資料。
既然要更新資料,就該把 items 換成 state,所以包成
const [items, setItems] = useState(['A', 'B', 'C'])然後宣告一下 onDragEnd
  const onDragEnd = (result) => {
    const { source, destination } = result

    // 如果目的地都沒變就跳出
    if (
      source.droppableId === destination.droppableId &&
      source.index === destination.index
    ) {
      return
    }


    // 製作新的 items
    const newItems = [...items]

    // 把兩個索引的值對調,相當於 [a, b] = [b, a]
    ;[newItems[source.index], newItems[destination.index]] = [
      newItems[destination.index],
      newItems[source.index],
    ]

    // 設定新的 items
    setItems(newItems)
  }
把上面那段掛到 <DragDropContext> 的 props 中就可以了。
使用 snapshot
在 <Droppable> 與 <Draggable> 中函數第二個參數為 snapshot,可以再多得到一些額外資訊,例如常用的
- Draggable
- snapshot.isDragging => 是否正在 dragging
- Droppable
- snapshot.isDraggingOver => 是否有東西拖進來
一些範例
改變背景顏色 (對 className 做了一點處理)
<DragDropContext onDragEnd={onDragEnd}>
  <h1 className="border-b mb-4 pb-2 text-4xl">Todo</h1>
  <main>
    <Droppable droppableId="drop-id">
      {(provided, snapshot) => (
        <div
          ref={provided.innerRef}
          {...provided.droppableProps}
          className={`${
            snapshot.isDraggingOver ? ' bg-neutral-200' : ''
          }`}
        >
          {items.map((item, i) => (
            <div key={item}>
              <Draggable draggableId={item} index={i}>
                {(provided, snapshot) => (
                  <div
                    {...provided.draggableProps}
                    {...provided.dragHandleProps}
                    ref={provided.innerRef}
                    className={`mt-4 p-2 border rounded-sm ${
                      snapshot.isDragging ? 'bg-blue-300' : ''
                    }`}
                  >
                    {item}
                  </div>
                )}
              </Draggable>
            </div>
          ))}
          {provided.placeholder}
        </div>
      )}
    </Droppable>
  </main>
</DragDropContext>
把可拖的對象換掉
重點在於把 {...provided.dragHandleProps} 給你想要綁的 DOM
<Draggable draggableId={item} index={i}>
  {(provided, snapshot) => (
    <div
      {...provided.draggableProps}
      ref={provided.innerRef}
      className={`flex mt-2 border items-center ${
        snapshot.isDragging ? 'bg-blue-300' : ''
      }`}
    >
      <div
        {...provided.dragHandleProps}
        className="w-10 h-10 bg-purple-500 mr-4"
      ></div>
      <div>{item}</div>
    </div>
  )}
</Draggable>
多個欄位間互相拖拉
這邊以兩個 Column 當範例
簡單設定一個 state 與一個常數
  const [columns, setColumns] = useState({
    A: ['A', 'B', 'C'],
    B: [],
  })

  const columnKeys = Object.keys(columns)
再來渲染的時候就要以 columnKeys 開始,裡面 items 就要根據不同的 key 做 render
<div className="border w-fit mx-auto mt-2 p-4">
  <DragDropContext onDragEnd={onDragEnd}>
    <main className="flex">
      {columnKeys.map((column) => (
        <div key={column} className="mx-4">
          <h1 className="border-b mb-4 pb-2 text-4xl">Column {column}</h1>
          <Droppable droppableId={column}>
            {(provided, snapshot) => (
              <div
                ref={provided.innerRef}
                {...provided.droppableProps}
                className={`min-h-[100px] ${
                  snapshot.isDraggingOver ? ' bg-neutral-200' : ''
                }`}
              >
                {columns[column].map((item, i) => (
                  <div key={item}>
                    <Draggable draggableId={item} index={i}>
                      {(provided, snapshot) => (
                        <div
                          {...provided.draggableProps}
                          ref={provided.innerRef}
                          className={`flex mt-2 border items-center ${
                            snapshot.isDragging ? 'bg-blue-300' : ''
                          }`}
                        >
                          <div
                            {...provided.dragHandleProps}
                            className="w-10 h-10 bg-purple-500 mr-4"
                          ></div>
                          <div>{item}</div>
                        </div>
                      )}
                    </Draggable>
                  </div>
                ))}
                {provided.placeholder}
              </div>
            )}
          </Droppable>
        </div>
      ))}
    </main>
  </DragDropContext>
</div>
最後是核心邏輯(交換的部分)
  const onDragEnd = (result) => {
    const { source, destination, draggableId } = result

    // 如果沒變就跳出
    if (
      source.droppableId === destination.droppableId &&
      source.index === destination.index
    ) {
      return
    }

    // 如果在同一個容器中交換
    if (source.droppableId === destination.droppableId) {
      // 抓出對應的 items 之後做交換
      const items = [...columns[source.droppableId]]

      ;[items[source.index], items[destination.index]] = [
        items[destination.index],
        items[source.index],
      ]

      setColumns({
        ...columns,
        [source.droppableId]: items,
      })

      return
    }

    // 否則就是在不同容器中移動,要抓出對應的items做操作
    const fromItems = [...columns[source.droppableId]]
    const toItems = [...columns[destination.droppableId]]

    fromItems.splice(source.index, 1)
    toItems.splice(destination.index, 0, draggableId)

    setColumns({
      ...columns,
      [source.droppableId]: fromItems,
      [destination.droppableId]: toItems,
    })
  }
到這就大功告成了,也可以嘗試對 columns 多加幾個試試,功能也會正常。
其實看到這文件他的文件也差不多看習慣了,不過既然都整理好了就當作幫助給一開始跟我一樣不習慣的人吧
這邊只有紀錄常用的功能,更細節的還是要回到官方文件哦!