
Bottender - Linebot 實踐
tags: Bottender Node.js
category: Linebot
description: Bottender - Linebot 實踐
created_at: 2021/07/12 21:00:00
這篇會用到 Line Bot Designer ,所以可以先去官方網站下載:
https://developers.line.biz/en/bot-designer/download/
看看 Context
在開始使用 Designer 之前,先來了解一下怎麼回應給 User ,所以先打開專案下的 src/index.js 看看裡面有什麼東西
module.exports = async function App(context) {
  await context.sendText('Welcome to Bottender');
};
依照上次最後的結果,是輸入任何訊息都會回應 Welcome to Bottender,所以最基本的就是使用 context.sendText(訊息) 送出訊息給使用者。
那再來看看 context 裡面有什麼東西
LineContext {
  // ...
  _client: LineClient {
    // ...
    axios: [Function: wrap] {
      request: [Function: wrap],
      getUri: [Function: wrap],
      delete: [Function: wrap],
      get: [Function: wrap],
      head: [Function: wrap],
      options: [Function: wrap],
      post: [Function: wrap],
      put: [Function: wrap],
      patch: [Function: wrap],
      defaults: [Object],
      interceptors: [Object]
    },
    // ...
  },
  _event: LineEvent {
    _rawEvent: {
      type: 'message',
      message: { type: 'text', id: '14383270522846', text: 'Hello' },
      timestamp: 1626120352749,
      source: [Object],
      replyToken: '...',
      mode: 'active'
    },
    _destination: '...'
  },
  // ...
}
可以看到其實裡面已經包了一個 axios ,所以如果之後需要打 HTTP Request,可以直接拿來用
另外 event 就是我們主要會需要用到的東西,稍微看一下他的原始碼有什麼能用,而這些方法大多都能夠在官方文件中找到用法與範例: https://bottender.js.org/docs/en/api-line-event
// ...
export default class MessengerEvent implements Event<MessengerRawEvent> {
    // ...
    get rawEvent(): MessengerRawEvent;
    get timestamp(): number;
    get isMessage(): boolean;
    get message(): EventMessage | null;
    get isText(): boolean;
    get text(): string | null;
    get hasAttachment(): boolean;
    get attachments(): EventMessageAttachment[] | null;
    get isImage(): boolean;
    get image(): MediaAttachmentPayload | null;
    get isAudio(): boolean;
    get audio(): MediaAttachmentPayload | null;
    get isVideo(): boolean;
    get video(): MediaAttachmentPayload | null;
    get isLocation(): boolean;
    get location(): LocationAttachmentPayload | null;
    get isFile(): boolean;
    get file(): MediaAttachmentPayload | null;
    get isFallback(): boolean;
    get fallback(): FallbackAttachment | null;
    get isSticker(): boolean;
    get sticker(): number | null;
    get isLikeSticker(): boolean;
    get isQuickReply(): boolean;
    get quickReply(): EventMessageQuickReply | null;
    get isEcho(): boolean;
    get isPostback(): boolean;
    get postback(): EventPostback | null;
    get isGamePlay(): boolean;
    get gamePlay(): EventGamePlay | null;
    get isOptin(): boolean;
    get optin(): EventOptin | null;
    get isPayment(): boolean;
    get payment(): EventPayment | null;
    get isCheckoutUpdate(): boolean;
    get checkoutUpdate(): EventCheckoutUpdate | null;
    get isPreCheckout(): boolean;
    get preCheckout(): EventPreCheckout | null;
    get isRead(): boolean;
    get read(): EventRead | null;
    get isDelivery(): boolean;
    get delivery(): EventDelivery | null;
    get isPayload(): boolean;
    get payload(): string | null;
    get isPolicyEnforcement(): boolean;
    get policyEnforcement(): EventPolicyEnforcement | null;
    get isAppRoles(): boolean;
    get appRoles(): EventAppRoles | null;
    get isStandby(): boolean;
    get isPassThreadControl(): boolean;
    get passThreadControl(): EventPassThreadControl | null;
    get isTakeThreadControl(): boolean;
    get takeThreadControl(): EventTakeThreadControl | null;
    get isRequestThreadControl(): boolean;
    get isRequestThreadControlFromPageInbox(): boolean;
    get requestThreadControl(): EventRequestThreadControl | null;
    get isFromCustomerChatPlugin(): boolean;
    get isReferral(): boolean;
    get referral(): EventReferral | null;
    get ref(): string | null;
    get pageId(): string | null;
    get isBrandedCamera(): boolean;
    get brandedCamera(): EventBrandedCamera | null;
    get isAccountLinking(): boolean;
    get accountLinking(): EventAccountLinking | null;
    get isReaction(): boolean;
    get reaction(): EventReaction | null;
}
接收文字
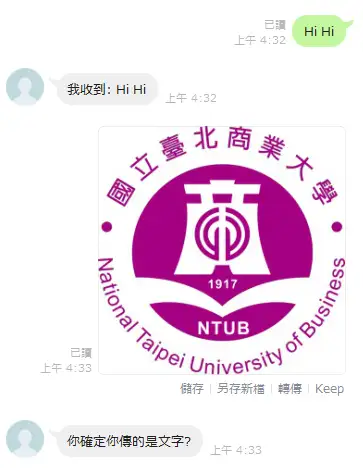
所以假設我要取得使用者傳來的文字,回應他我收到什麼,只要像這樣:
module.exports = async function App(context) {
    if (context.event.isText) {
        await context.sendText(`我收到: ${context.event.text}`);
    } else {
        await context.sendText('你確定你傳的是文字?');
    }
};
Line Bot Designer
那學會回應文字給使用者之後,再來要嘗試怎麼回應一些 特殊 的東西給使用者,例如常常看到的下面這種內容

這時候我們就需要 Line Bot Designer 來輔助了,所以先打開他並登入
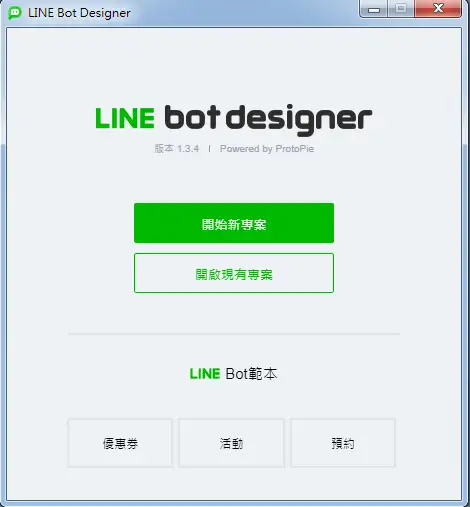
看到主畫面之後開啟新專案
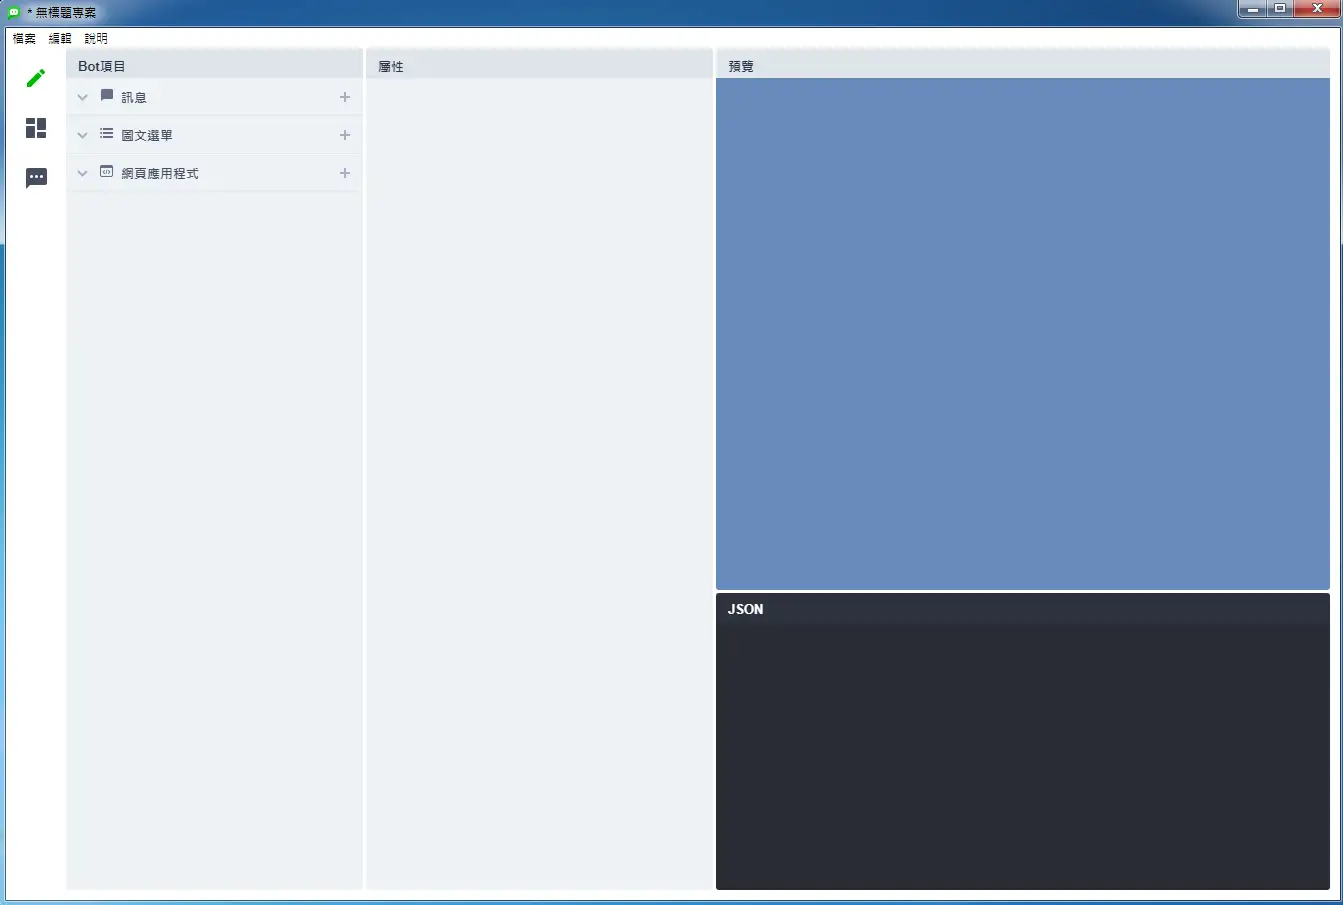
- 左邊可以建立訊息
- 中間可以修改訊息的一些屬性
- 右上方是預覽
- 右下方是我們最後需要用的
JSON
在 Linebot 中訊息可以使用 JSON 做回應,所以剛才已經先使用函數的方式回應文字,現在改用 JSON 的方式回應試試
所以先在 Designer 左方建立一個文字訊息,會看到像這樣的結果
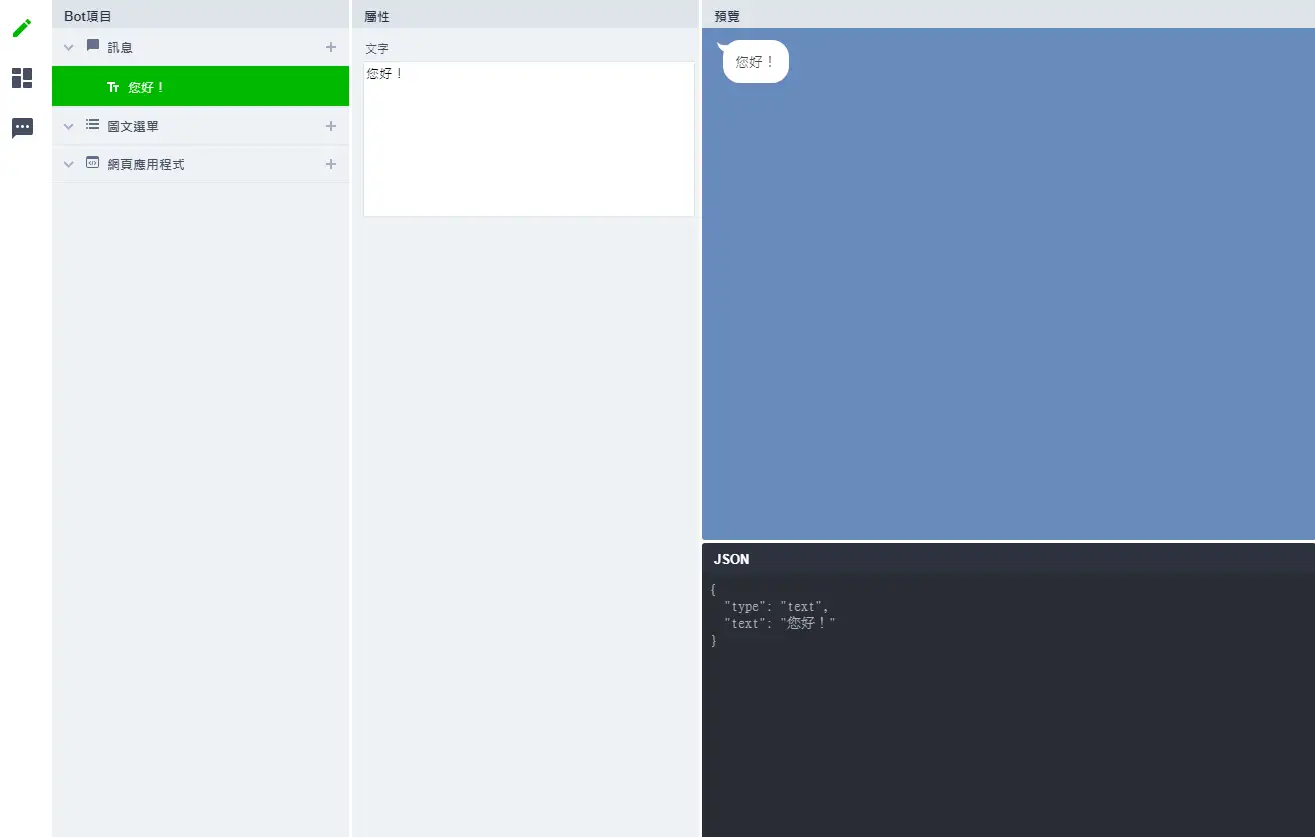
那我們把右邊的json拿來用
{
  "type": "text",
  "text": "您好!"
}
再來把程式改成這樣:
module.exports = async function App(context) {
    await context.send([{
        "type": "text",
        "text": "您好!"
    }]);
};
這樣他就會回應 您好! ,再來可能注意到了他是吃一個陣列,所以可以同時回應多個,所以如果改成下面這樣,他就會回應兩次 您好!
module.exports = async function App(context) {
    await context.send([{
        "type": "text",
        "text": "您好!"
    }, {
        "type": "text",
        "text": "您好!"
    }]);
};
圖文選單
再來下一步來做 圖文選單,圖文選單就是在官方帳號很常見的一個功能,可以在下方打開選單,點擊對應的功能,所以我們需要一張圖
打開你的小畫家
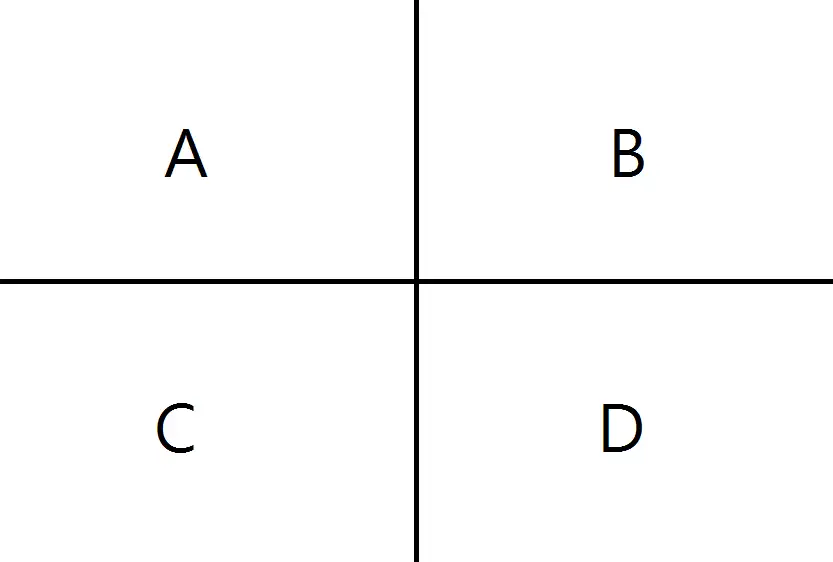
上面是我要使用的範例圖,如果沒有要自己設計一張的話可以考慮使用
官方連結: https://developers.line.biz/en/docs/messaging-api/using-rich-menus/
基本上 Line 圖文選單的邏輯是
- 先定義每個區塊的大小與行為並註冊(POST),假設為 A
- 上傳圖片綁定在 A 身上
- 設定 A 為預設選單或給單一或特定使用者
所以我們先到 Designer 上新增一個圖文選單,並選擇幾個基本的行為:
- 訊息動作: 單純回應訊息
- 回傳動作: 回應訊息 + 傳送資料到 Server
在右上方預覽區域可以框選區域,大概框好設定好之後會變成這樣
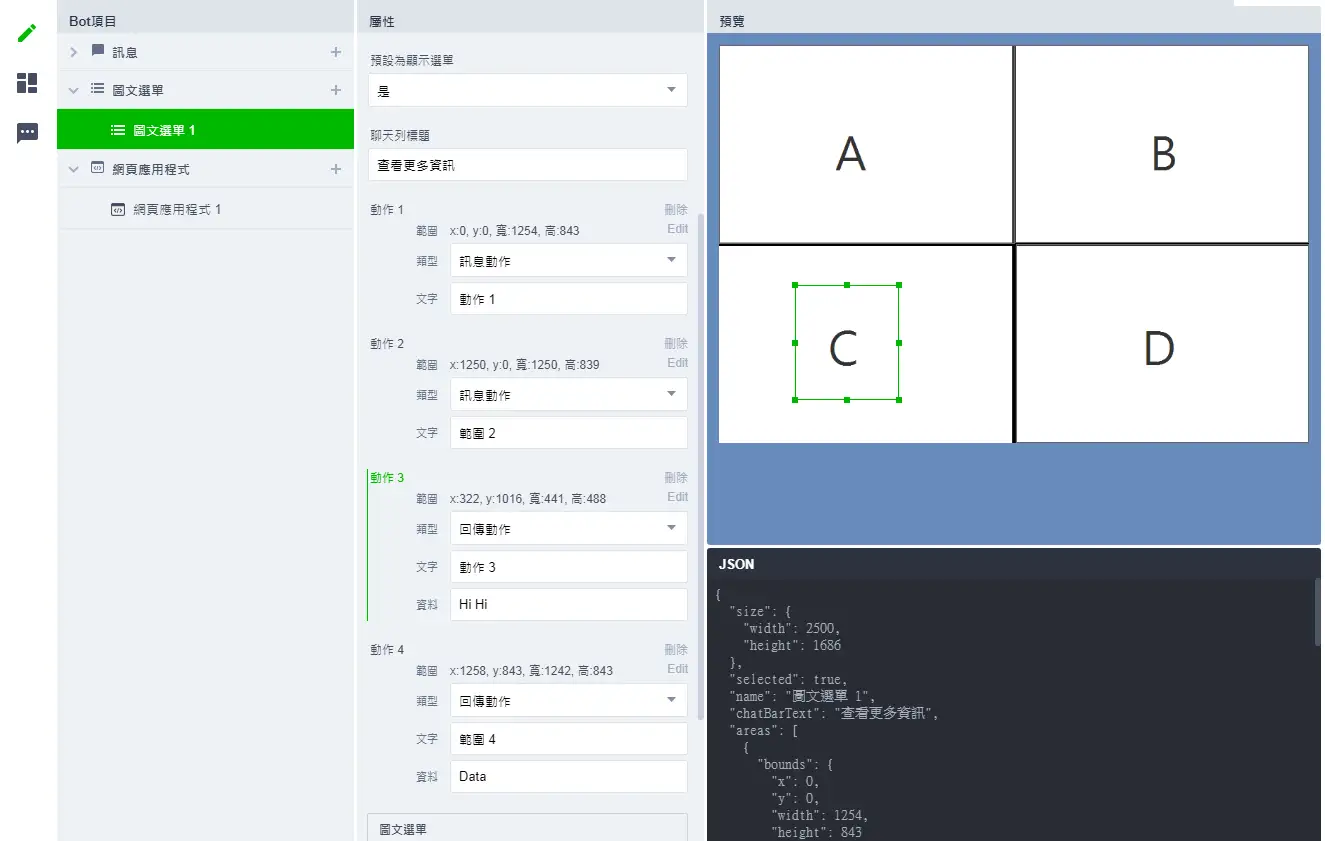
建立一個圖文選單,老樣子的需要拿右下角的 JSON 來用
官方文件: https://developers.line.biz/en/docs/messaging-api/using-rich-menus/#create-a-rich-menu
可以看到以下資訊
POST: https://api.line.me/v2/bot/richmenu
Headers: {
    Authorization: Bearer {channel access token}',
    Content-Type: application/json'
}
Body: 那一坨 JSON
這邊可以使用 Postman 或是你熟悉的方式建立 HTTP POST
Postman 官方下載: https://www.postman.com/downloads/
POST 成功後會得到一個 id,這個 id 就代表剛才那組區域,所以要留好。
輸出範例
{
    "richMenuId": "richmenu-4e79b6821d8f3afa5f11254558bae360"
}
註冊好之後,再來要上傳圖片綁在他上面
官方文件: https://developers.line.biz/en/docs/messaging-api/using-rich-menus/#upload-the-rich-menu-image
上傳圖檔限制: https://developers.line.biz/en/reference/messaging-api/#upload-rich-menu-image
限制大致上就是:
- 格式: JPEG, PNG
- 寬度: 800px ~ 2500px
- 高度: 250px ~ 更高
- 寬高比: 1.45 or more
- 大小限制: 1 MB
POST: https://api-data.line.me/v2/bot/richmenu/{richMenuId}/content
Headers: {
    Authorization: Bearer {channel access token}',
    Content-Type: image/(jpeg|png)'
}
Body: 圖檔
例如以我剛才的範例就是要POST: https://api-data.line.me/v2/bot/richmenu/richmenu-4e79b6821d8f3afa5f11254558bae360/content 這個網址
如果沒有錯誤的話會得到一個 {} 的回應
再來就是要綁定到使用者身上
官方文件: https://developers.line.biz/en/docs/messaging-api/using-rich-menus/#set-the-default-rich-menu
POST: https://api.line.me/v2/bot/user/all/richmenu/{richMenuId}
Headers: {
    Authorization: Bearer {channel access token}',
}
以我這次的例子的話就是去POST https://api.line.me/v2/bot/user/all/richmenu/richmenu-4e79b6821d8f3afa5f11254558bae360 這個網址
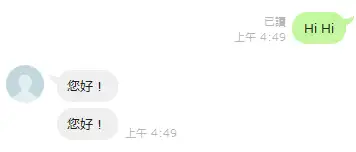
執行正常的話一樣會收到一個 {} 的回應,再來回到 Linebot 上面看就會發現已經成功綁定上去了。
綁定上去之後可以點點每一個區域,都會有對應到的行為,如果程式碼沒動的話,點擊上面兩個(A, B區域)都會顯示出兩次的 你好! ,而下面兩個(C, D區域)卻會顯示四次的 你好! ,這是為什麼呢?
因為上面有提到 回傳動作: 回應訊息 + 傳送資料到 Server 這件事情,所以他做了兩件事,而你 Server 又沒多做處理,自然就等於觸發了兩遍,當然就會有四次的輸出訊息。
處理回傳動作
你可以先 console.log(context.event) 把事件印出來看一下,這時你點擊 C區域 你應該會看到
LineEvent {
  _rawEvent: {
    type: 'postback',
    postback: { data: 'Hi Hi' },
    timestamp: 1626133167368,
    source: { type: 'user', userId: '...' },
    replyToken: '...',
    mode: 'active'
  },
  _destination: '...'
}
LineEvent {
  _rawEvent: {
    type: 'message',
    message: { type: 'text', id: '14383803081484', text: '動作 3' },
    timestamp: 1626133167368,
    source: { type: 'user', userId: '...' },
    replyToken: '...',
    mode: 'active'
  },
  _destination: '...'
}
不只有收到一個 text 的事件以外,還額外收到了一個 postback 的事件,這時你可以稍微做一點處理,例如
module.exports = async function App(context) {
    const {event} = context;

    if (event.isPostback) {
        const {data} = event.postback;
        console.log(data);
    } else if (event.isMessage) {
        await context.send([{
            "type": "text",
            "text": "您好!"
        }]);
    }
};
如果他是 postback 的事件,就會把資料抓出來印出來,而如果是一般的訊息就直接返回 您好!
最後這個時候你應該有能力自己根據每一種訊息做對應的處理了,下一篇將來使用 LIFF,在你的 Linebot 中使用網頁